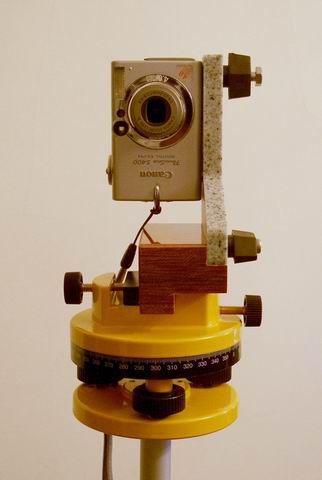
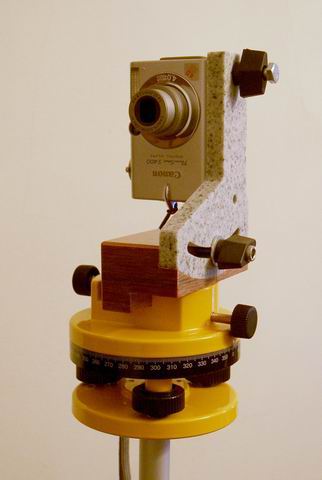
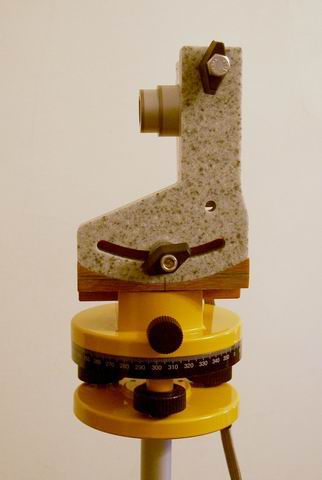
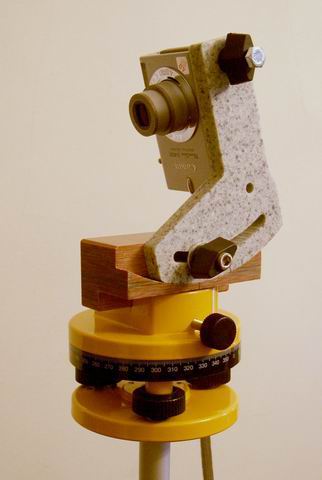
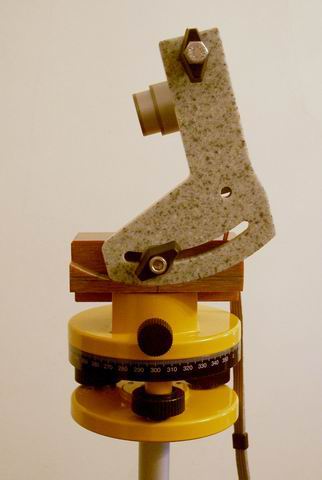
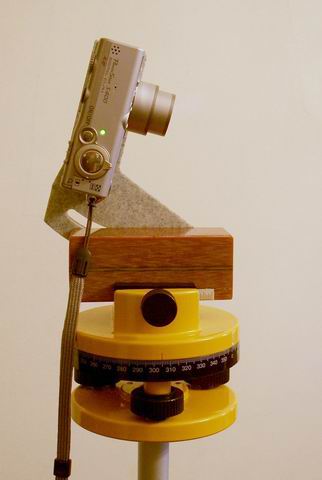
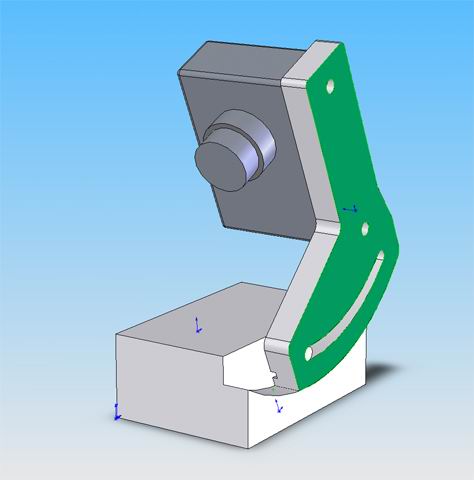
The pictures below are of my custom made panorama head. It is a spherical head in that it will rotate the camera about the nodal point in both the horizontal and vertical planes. The vertial rotation is restricted by virtue of the the bracket that the camera is mounted to. This bracket shape must be designed for the particular camera being used. The horizontal location of the nodal point is not fixed but is set by moving the entire assembly forward or backwards in the clamp. A scale on the side of the base of the bracket is used to set the location.
The rotating base is from a Laser Level assembly and costs about $30. The simple design makes the head compact, very easy to use and rigid.
|
|
|
|
|
|
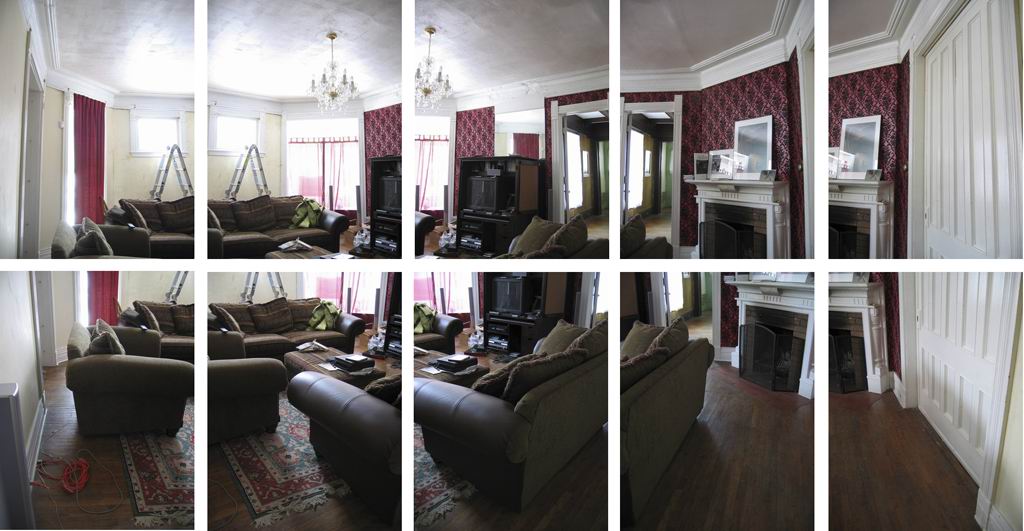
This is the very first panorama shot using this head and stitched together using Panavue Image Assembler. You can see that the image is made up of 10 frames. The first 5 were taken with the camera pointed slightly upwards and the next 5 with the camera pointed slightly downwards.
 |
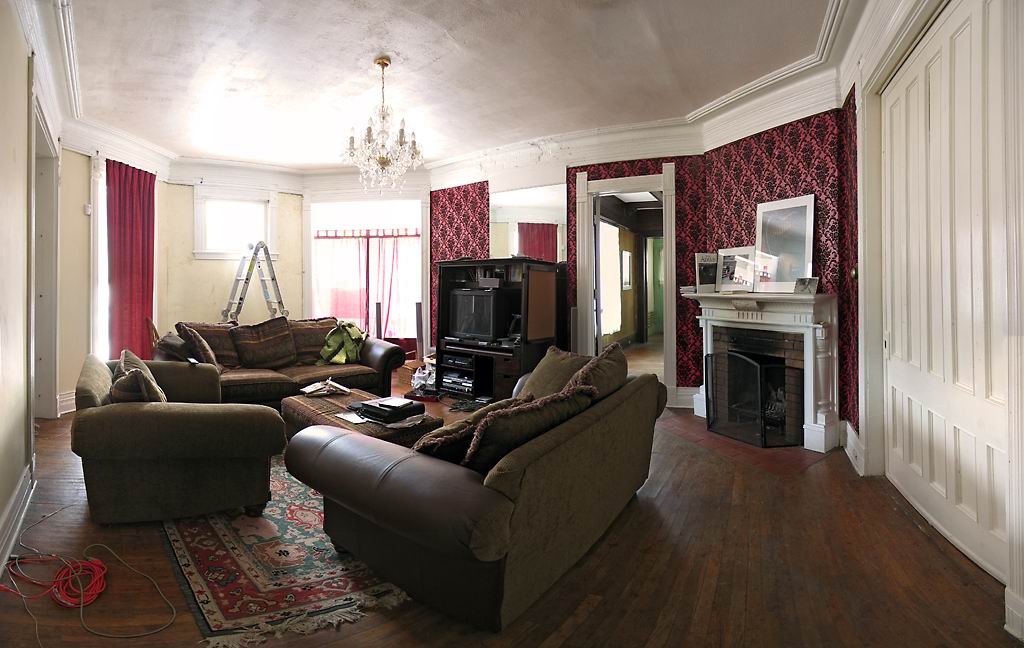 |
This image is of our living room during renovation. For more images check out 325.scotthendershot.com
 |
|---|
Another simple panorama |
 |
 |
 |
 |
 |
This design has obvious differences from the traditional panorama head design. So why make such a departure? What are the advantages?
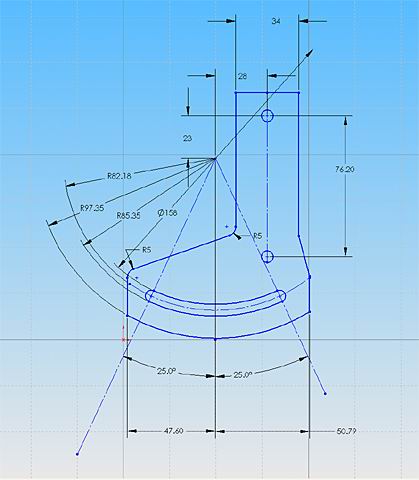
In a traditional design the camera is mounted on a bracket suspended away from the prime pivot of the unit. The prime pivot would be the horizontal rotation point nearest the tripod mount. Most heads are designed for universal use to allow mounting basically any camera and lens. This requires an adjustable bracket for each plane of movement. The interface of each bracket to another introduces potential weakness into the system and reduces rigidity. Reducing the number of joints and the distance of the camera from the joints drastically increases the rigidity of the system. Even constructing it out of plywood results in fantastic rigidity.
Since this bracket is designed for use with one specific camera there are no adjustments to be made. The camera is always aligned and the nodal point is always positioned correctly.
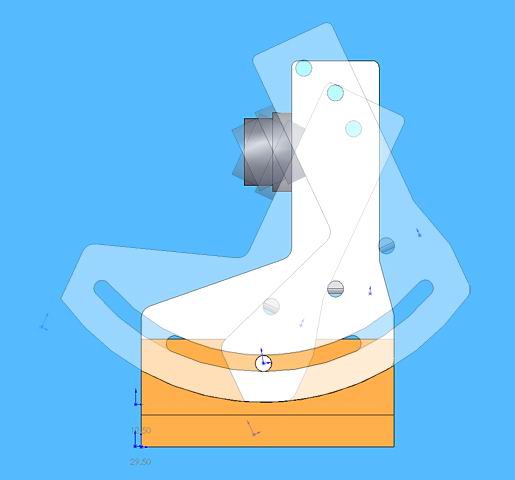
Again, being designed for a specific camera using it is as simple as mounting the camera to the bracket and it's ready to go.
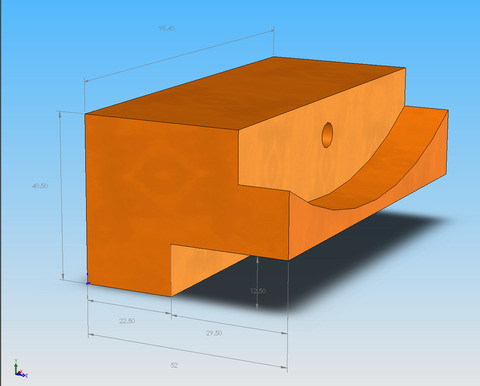
There are only 2 pieces that need to be fabricated for this head. The bracket and the base that the bracket mounts to. The bracket is easily cut out using a band saw, jig saw or other flexible cutting tool. One person I know of used a Dremel tool.
The choice of materials is not critical. It is not necessary to use aluminum, excellent rigidity is acheived using materials like Corian, Acrylic, MDF or plywood.
The very thing that makes this design attractive for use with one camera makes it undesireable as a universal mount. It is not adjustable and cannot be used for multiple cameras and lenses.
Hopefully you will find enough information here to duplicate the design. If you would like to use this design for a camera other than the Canon s400 I can send you a PDF document that details the design and construction of the head. The document shows step by step all aspects of designing and building the head. It shows all the critical measurements and sources for materials including the rotating base. It's not posted here because I'm not quite finished with it. When I'm done I will provide a link here so that it can be downloaded. Send any inquiries to panohead@scotthendershot.com
I have begun work on a second generation design that improves the smoothness of motion. Click Here to see the new design.

I have also built a Universal head that works with pretty much any camera. Click Here to have a look.
Return to Articles List